

We Make a Home: Interior Work Part 2
#: Tiles & Finishes
We Make A Home is a newsletter series about Emilio & I’s journey to build a home together (literally & figuratively)! We both value creativity and time in the natural world, and are working to create a place that reflects that. While I write from our direct experience in a way that I hope is helpful, please note that every place and situation will be a little bit different, and we’ll also choose to maintain our privacy in some areas.
We worked on tiling our showers in tandem with painting. Since we didn’t know when the electricity would come on and propel the project forward, we wanted to get everything finished as efficiently as possible.
Buying tile was one of the hardest parts of planning our design. We purchased it way back in September and October in preparation for the install. I love the look of rustic, handmade tile, like Zellige.
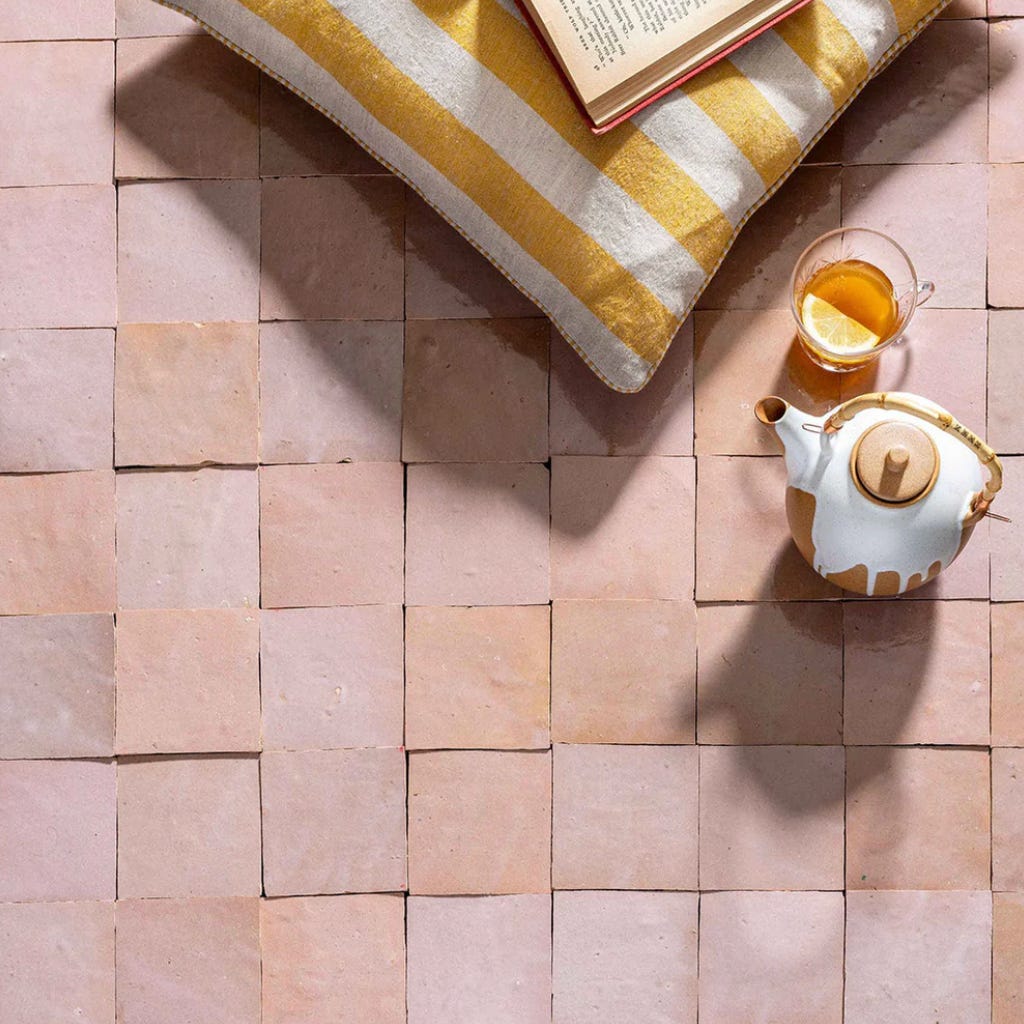
I was, at first, quite passionate about a pink tile somewhat like this for our bathroom. We did a lot of research, visited some tile stores, and eventually decided we should go with a Zellige-like tile, but not the actual style itself. This is because Zellige is (1) Expensive (2) Reportedly hard to install (3) Harder than other tiles to keep clean. This is because the tiles are quite uneven and different from one another, making raw edges and corners potentially protrude from the wall.
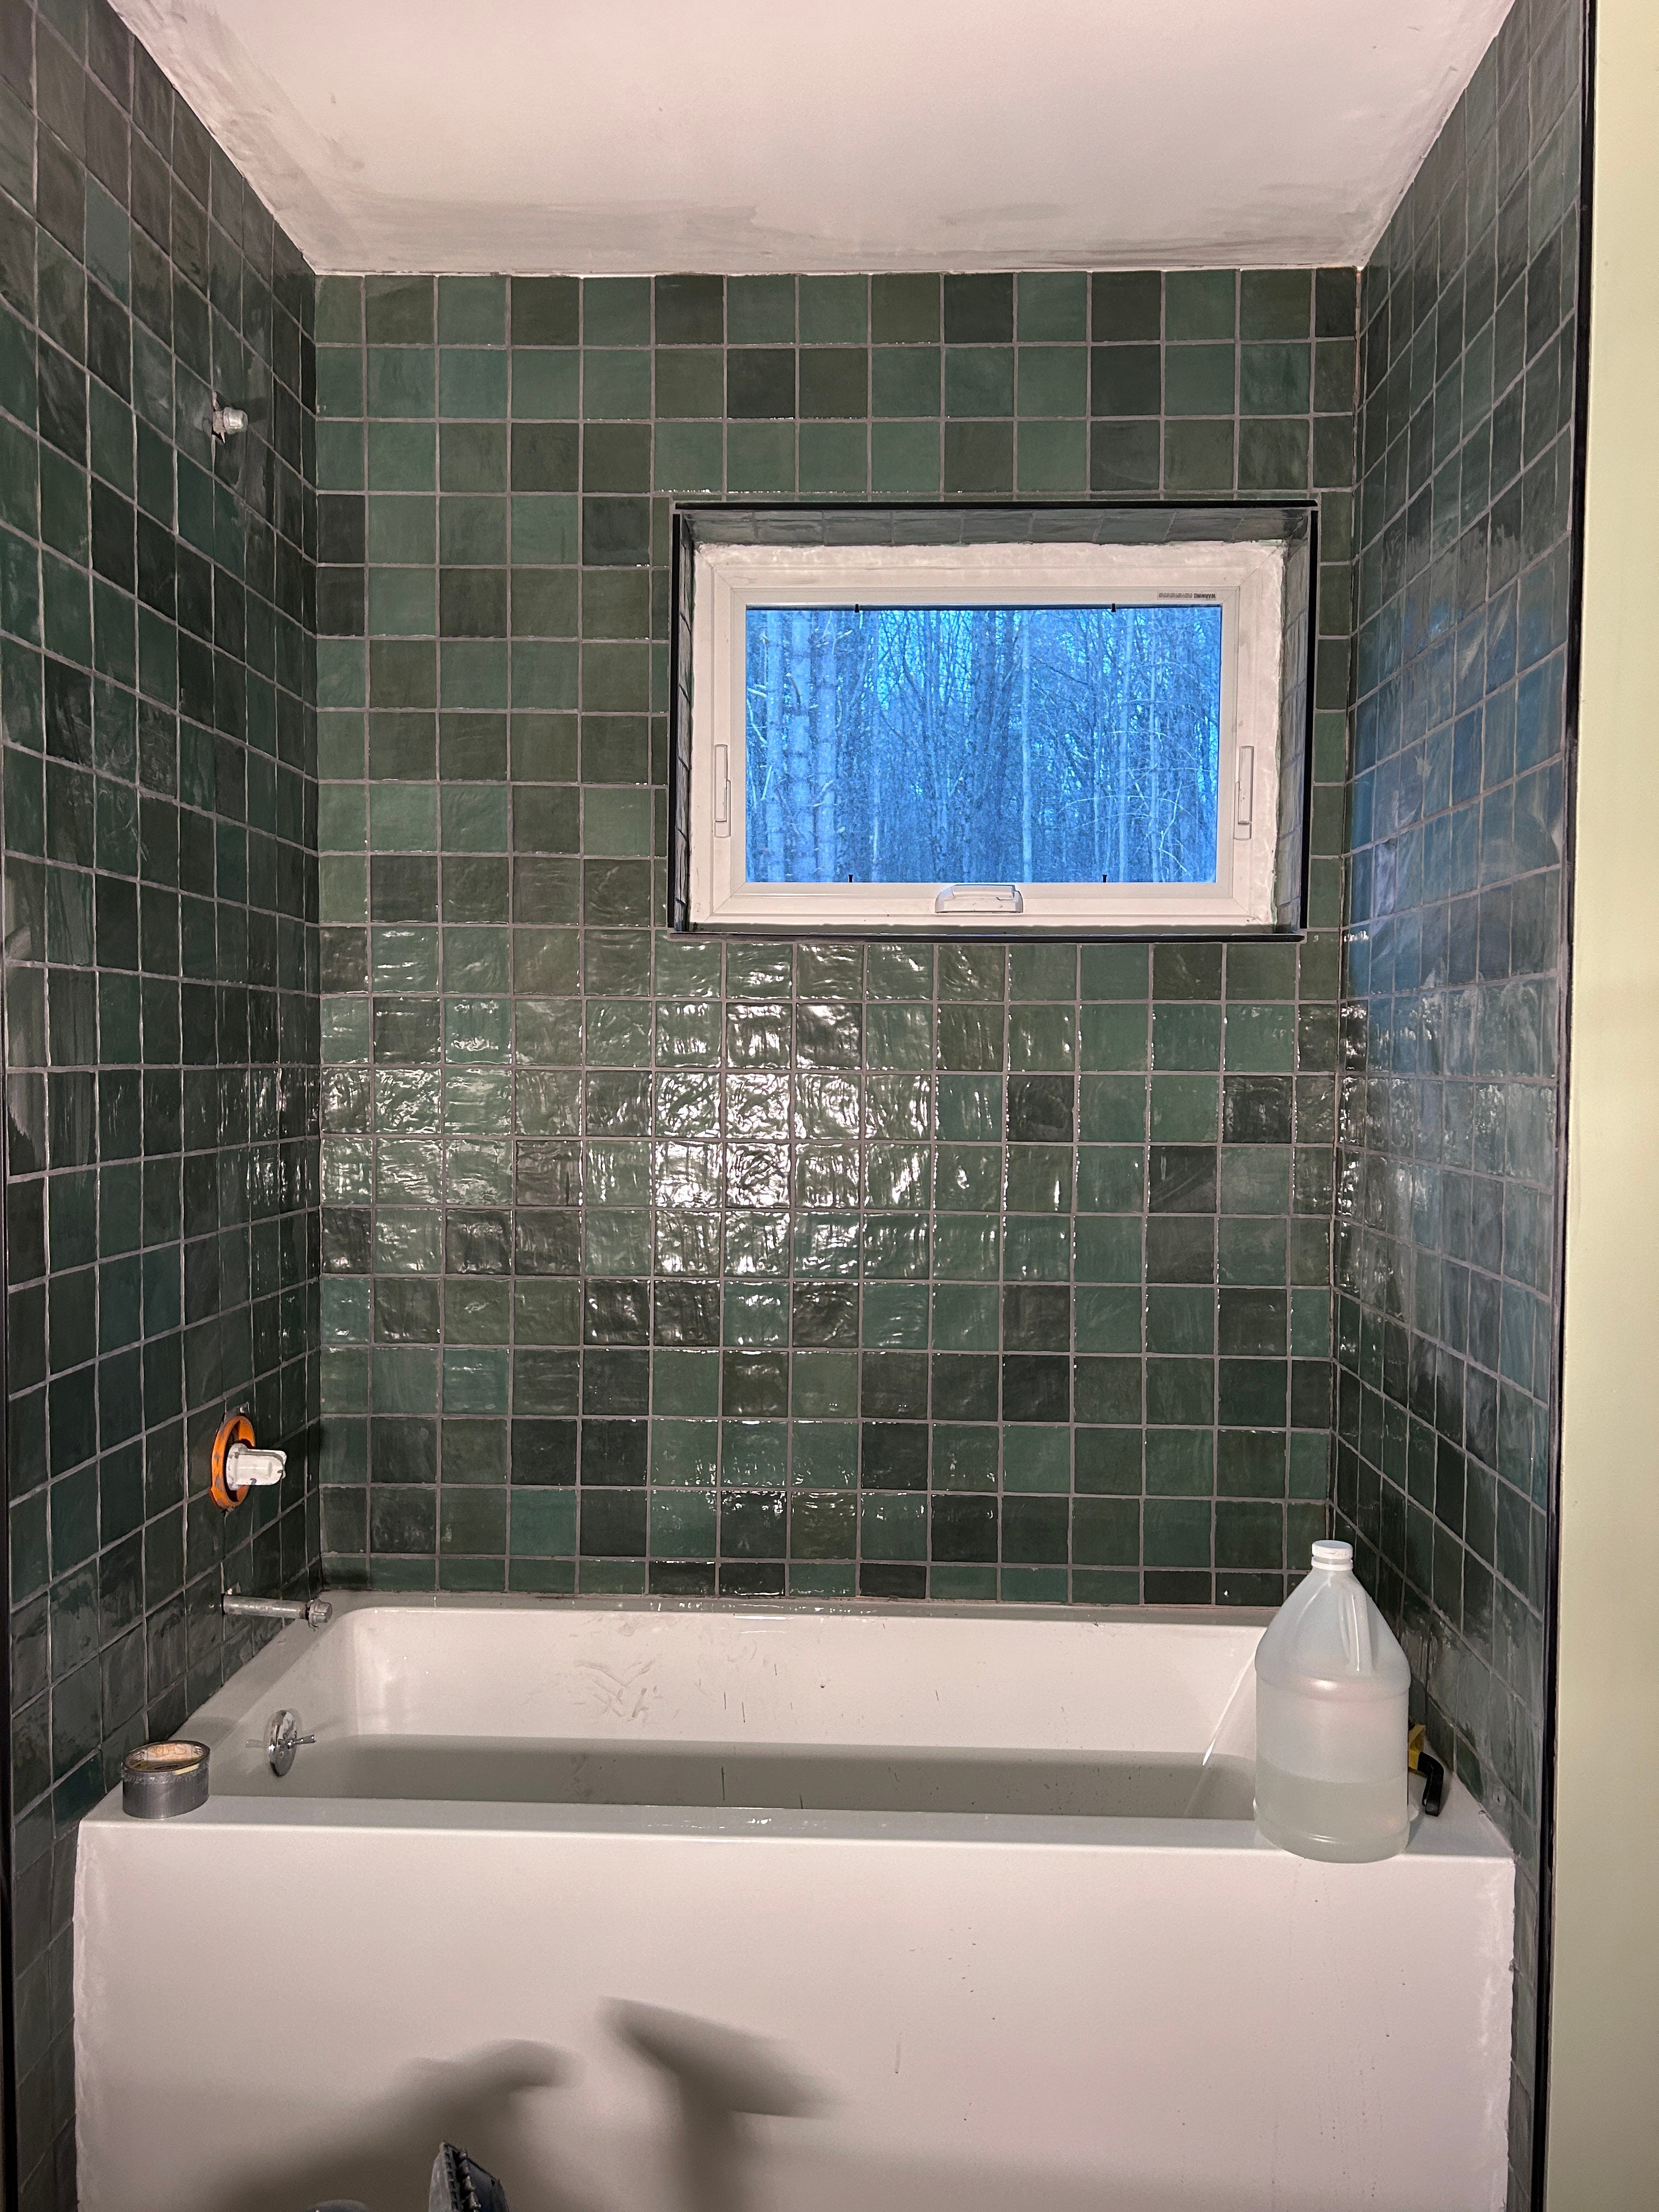
But, there are tiles that mimic this style at a lower price point and with fewer problems. We knew our second bathroom should be green, but when Emilio decided that pink tile felt too fleshy, we were at a loss for our primary bathroom color scheme. We liked the idea of a pear-like color, but after combing lots of sites, couldn’t find something suitable. Eventually we ordered several samples:
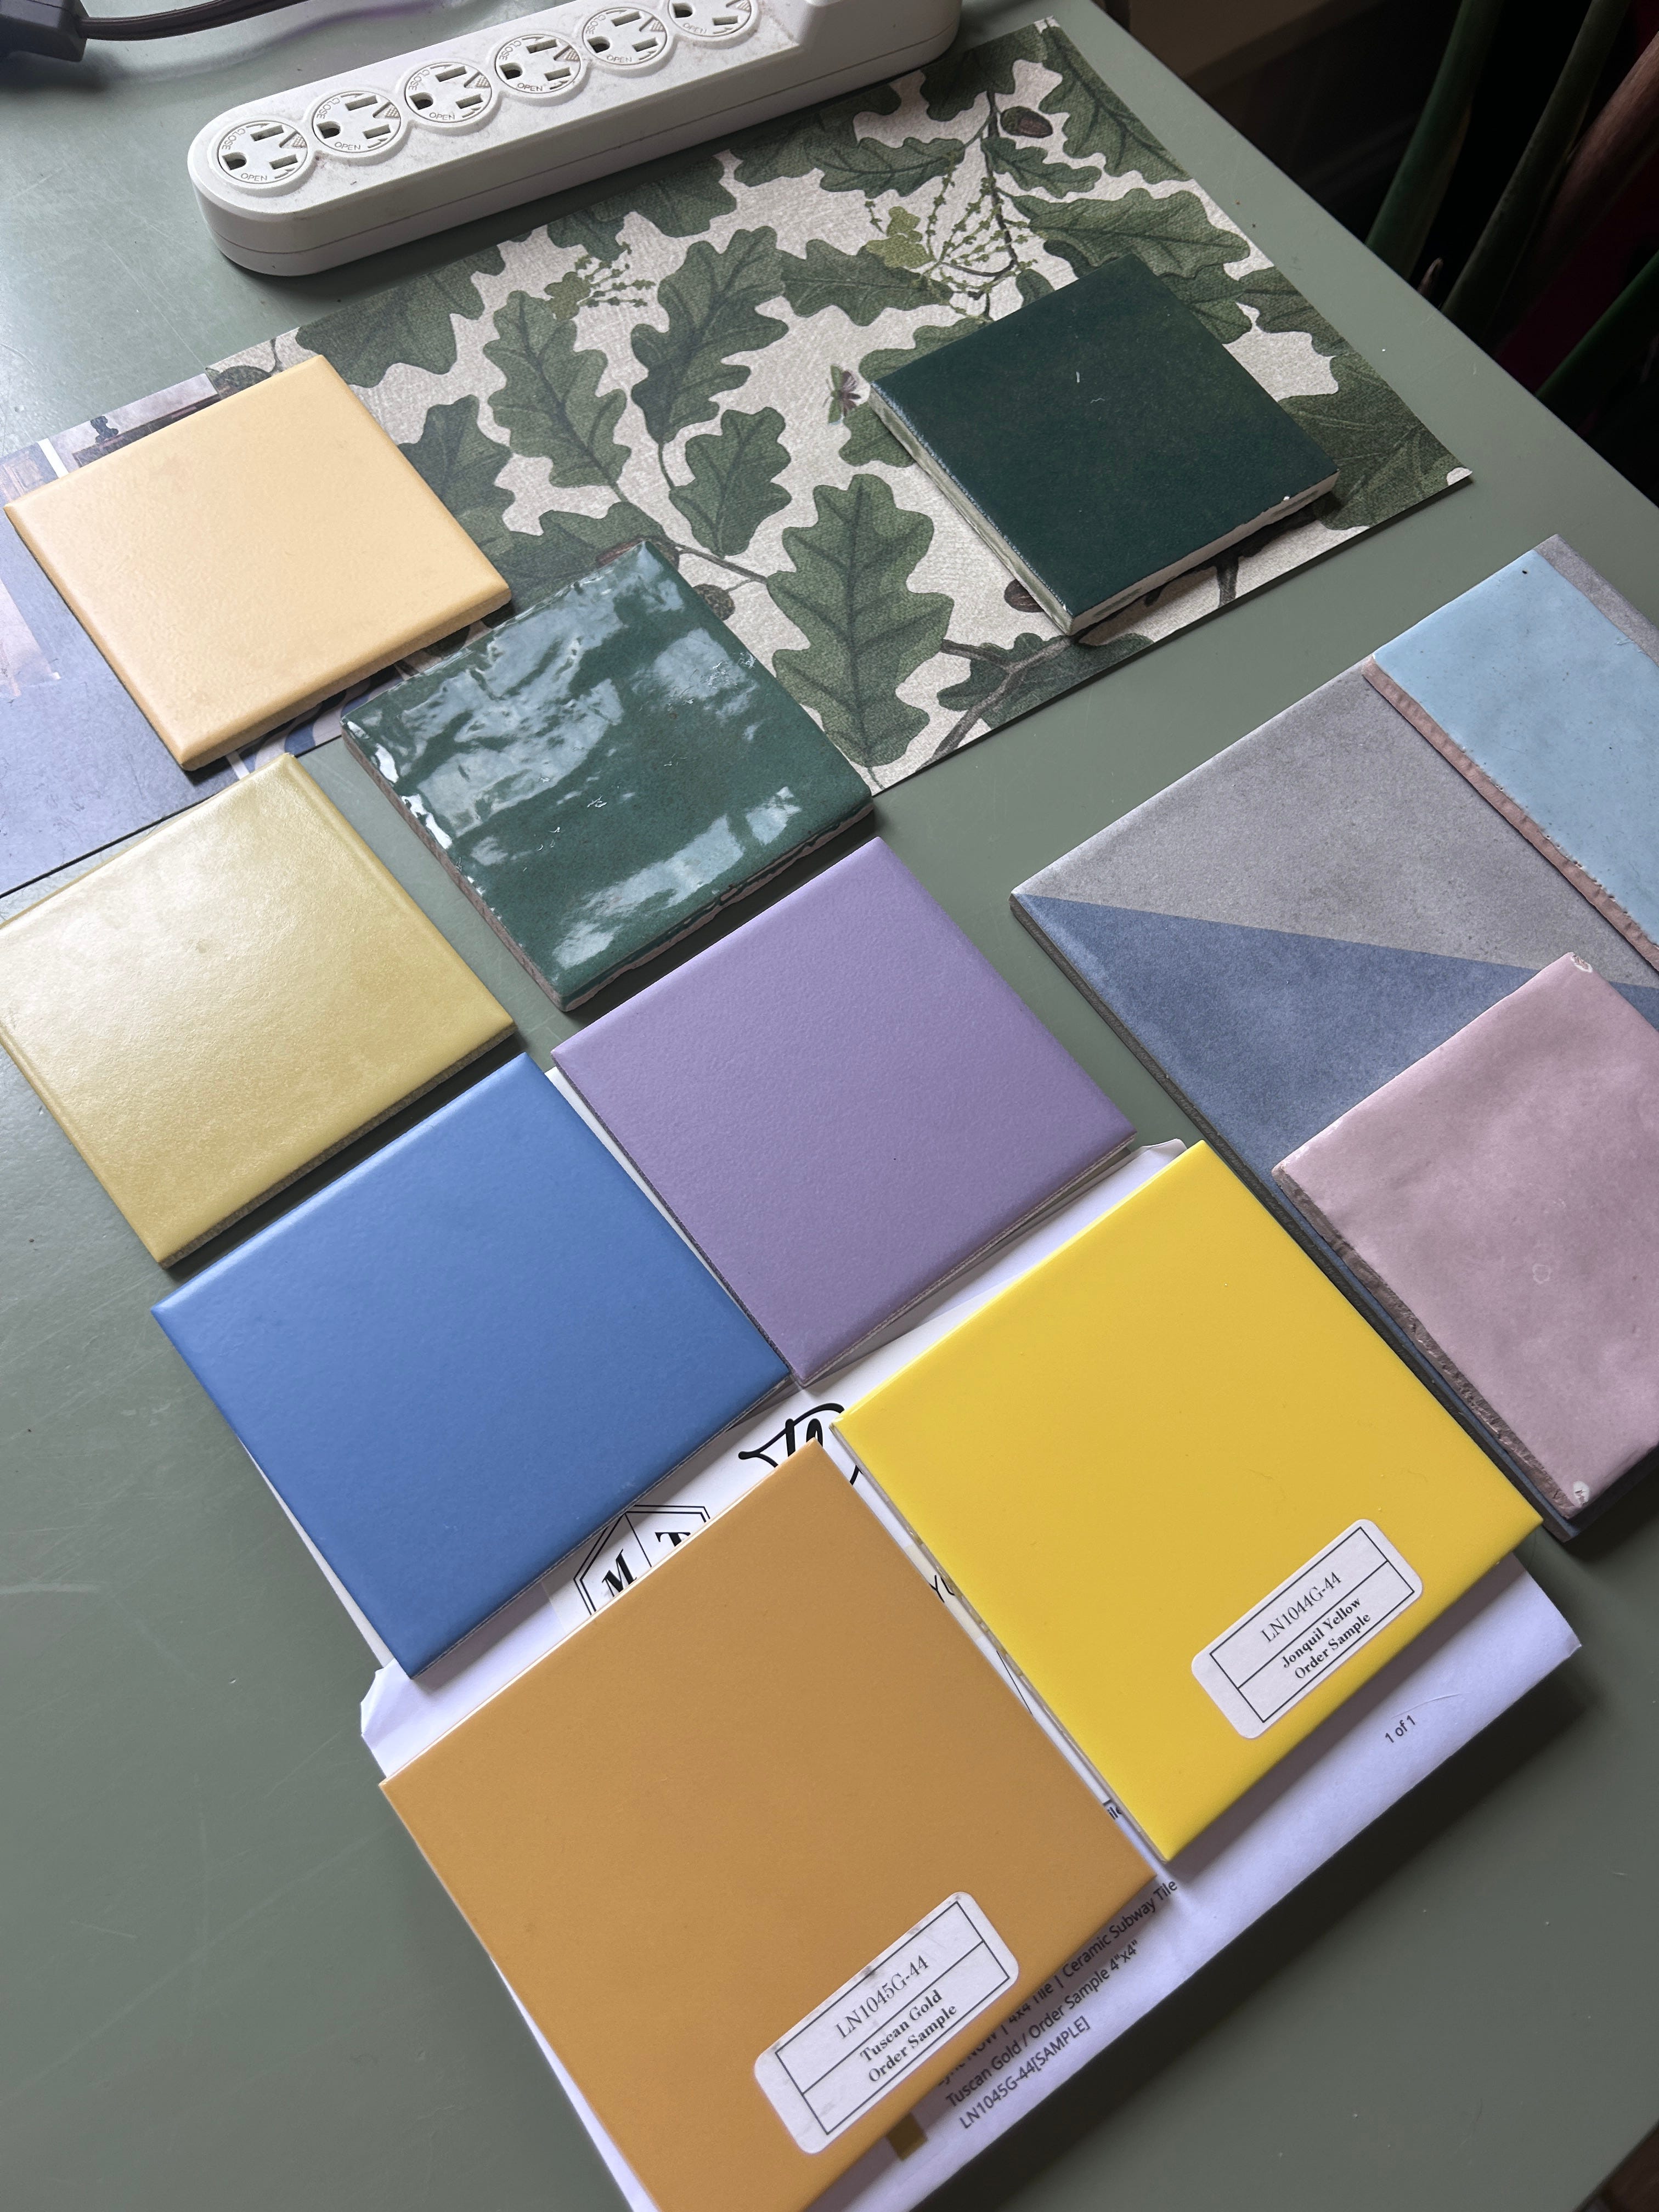
In all, we decided on the 2 tiles next to one another in the top row, Dijon Matte Colorwerk square tiles and Green Serena zellige-like square tiles (I’m not a fan of rectangle tile!).
Neither of us had experience tiling, but I like to take a how hard could it be? approach to most things. The hardest part of the process, and the thing we would do differently if we got to try again, was the waterproofing.
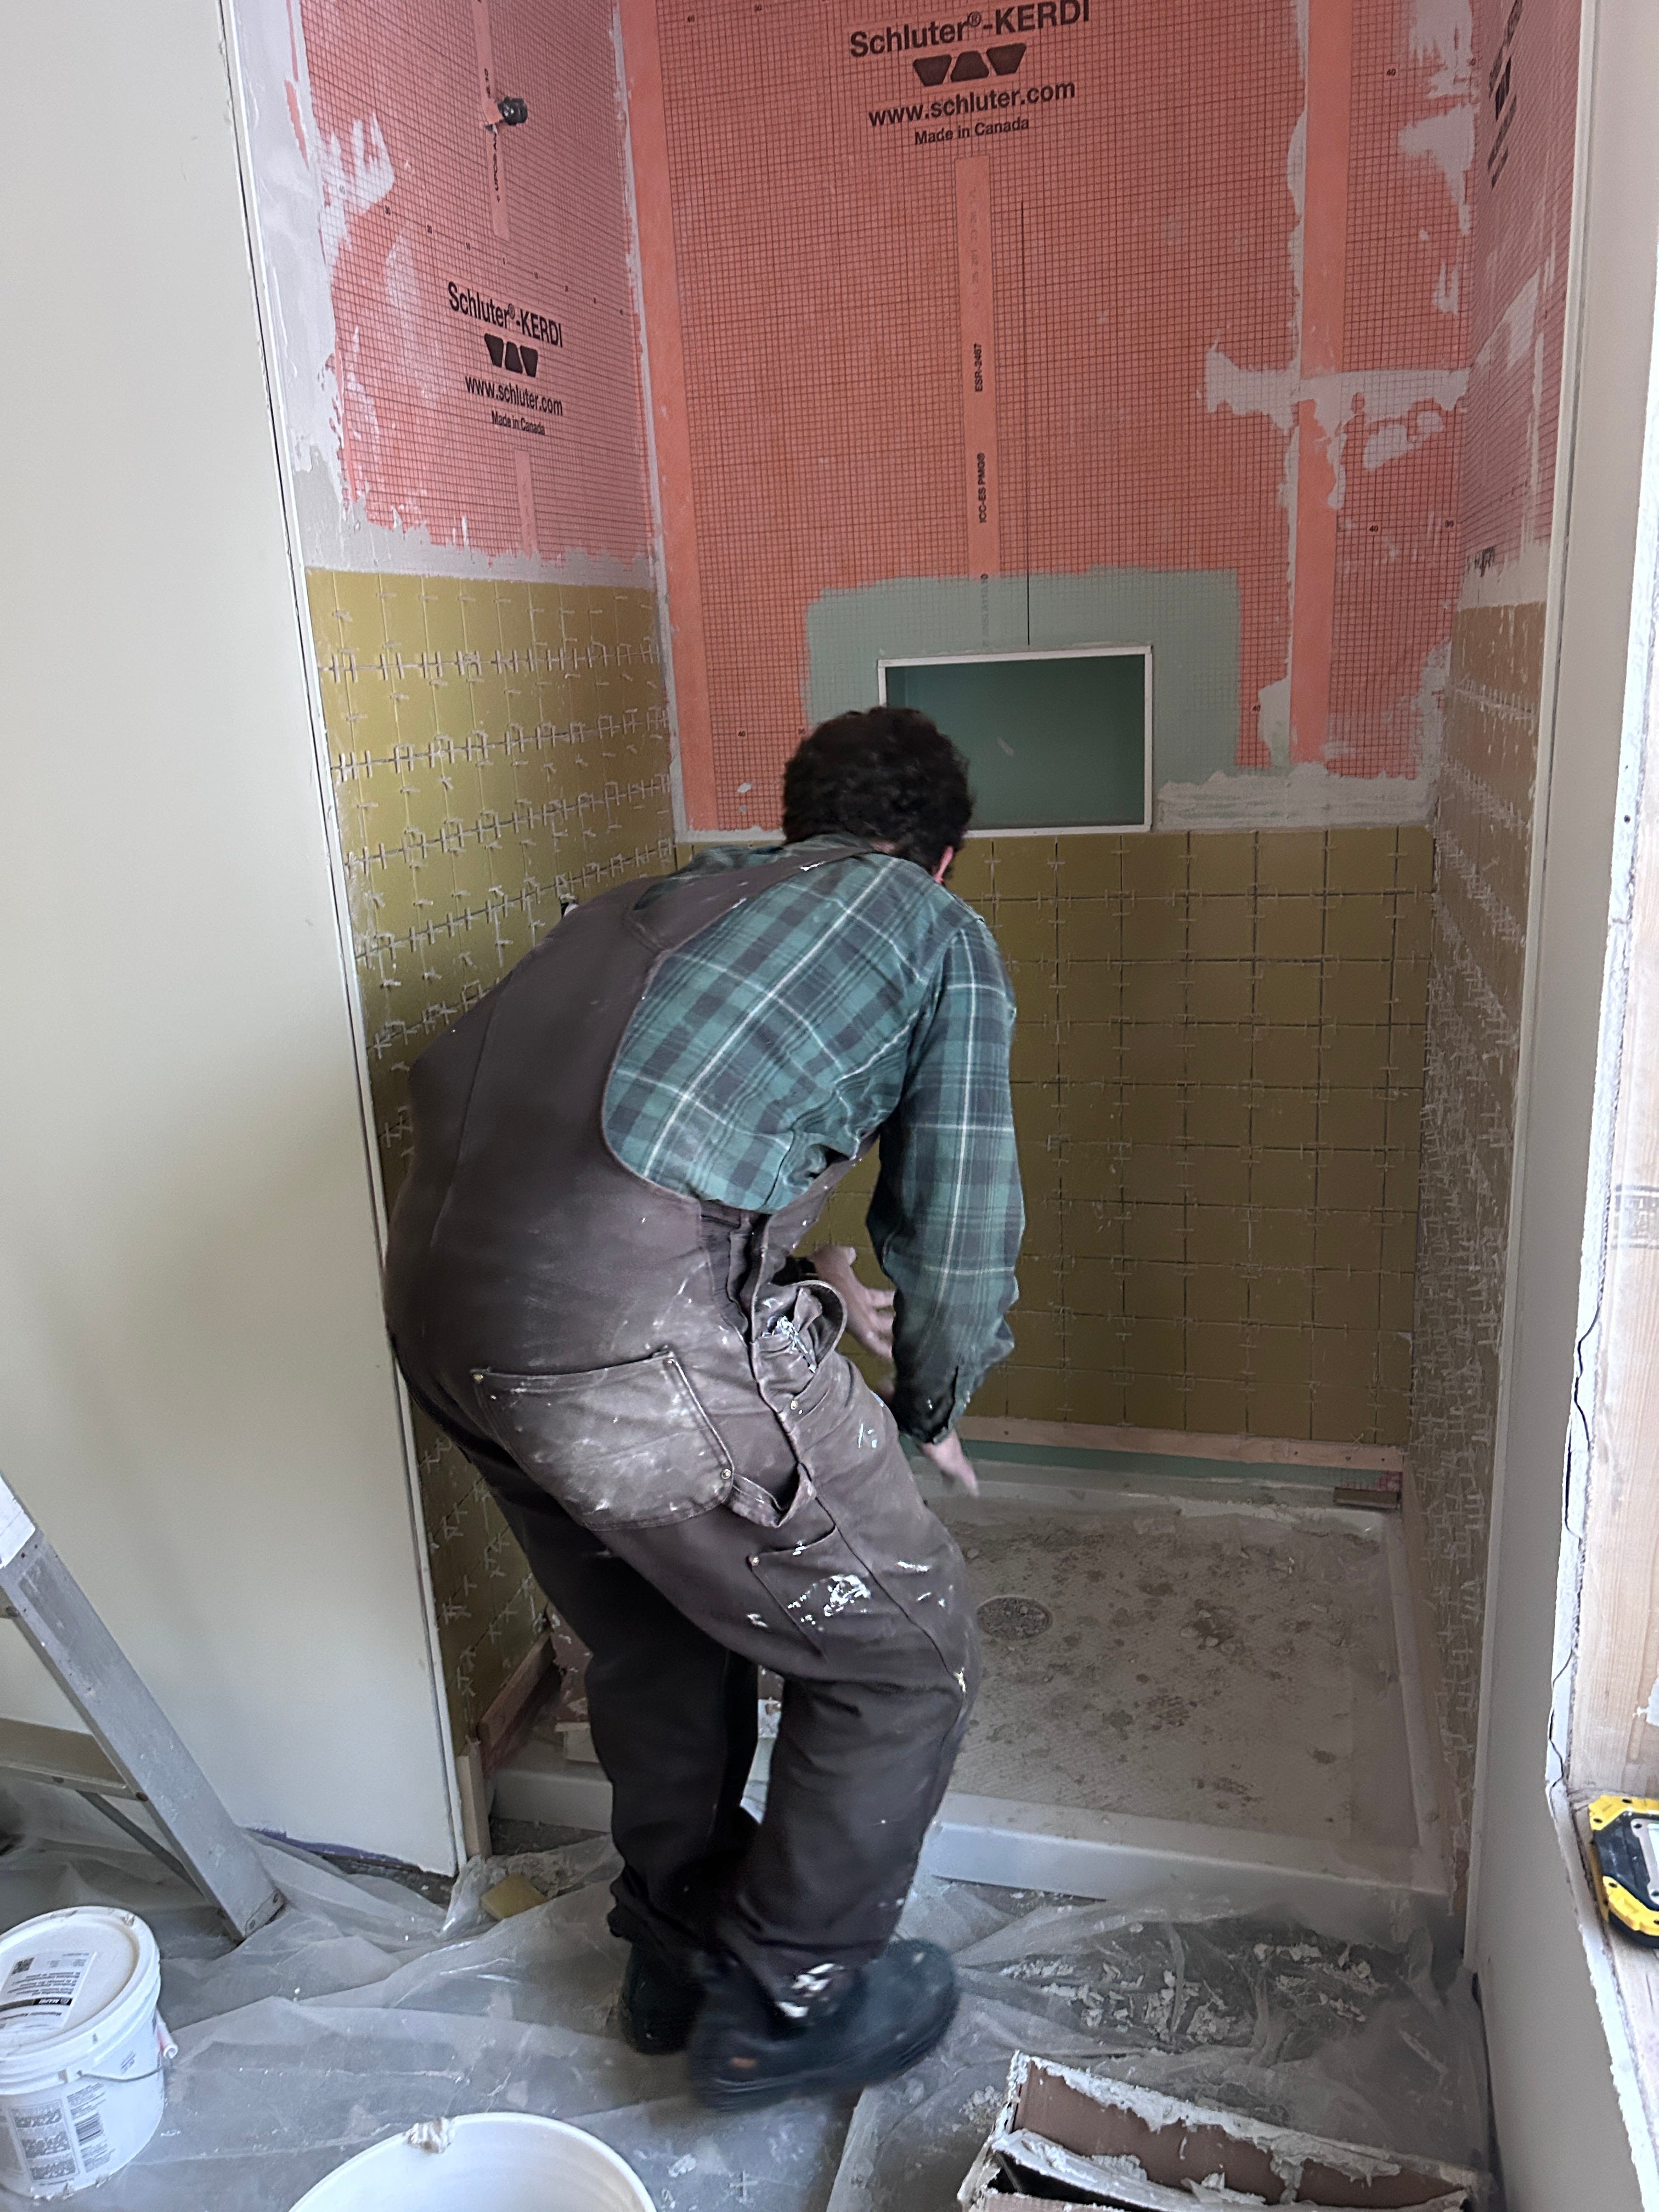
Tile is not waterproof itself. Though it sheds most of the water, it needs to be installed on top of a truly waterproof surface. We used a system called the Schluter system to waterproof. This system comes in 2 forms: a sheet that can be applied to drywall, or boards that can be installed instead of drywall.
We originally approached our contractors about installing the latter, but they insisted that we should just go with the former. And, since we were completely new to this, we did. But, the sheets were much, much harder to install!
Like big rolls of wrapping paper, the sheets had to be unrolled, measured, cut, and then attached to the walls with mortar. While we did this, it was much harder than having the contractors install the boards. Beyond that, having mortar as the foundation of the tile just meant that we were working with a less perfectly flat surface than if we had been tiling onto perfectly flat boards, making laying totally even tile less possible.
So—go with the board! Laying the tile itself was a lot easier than I had anticipated.
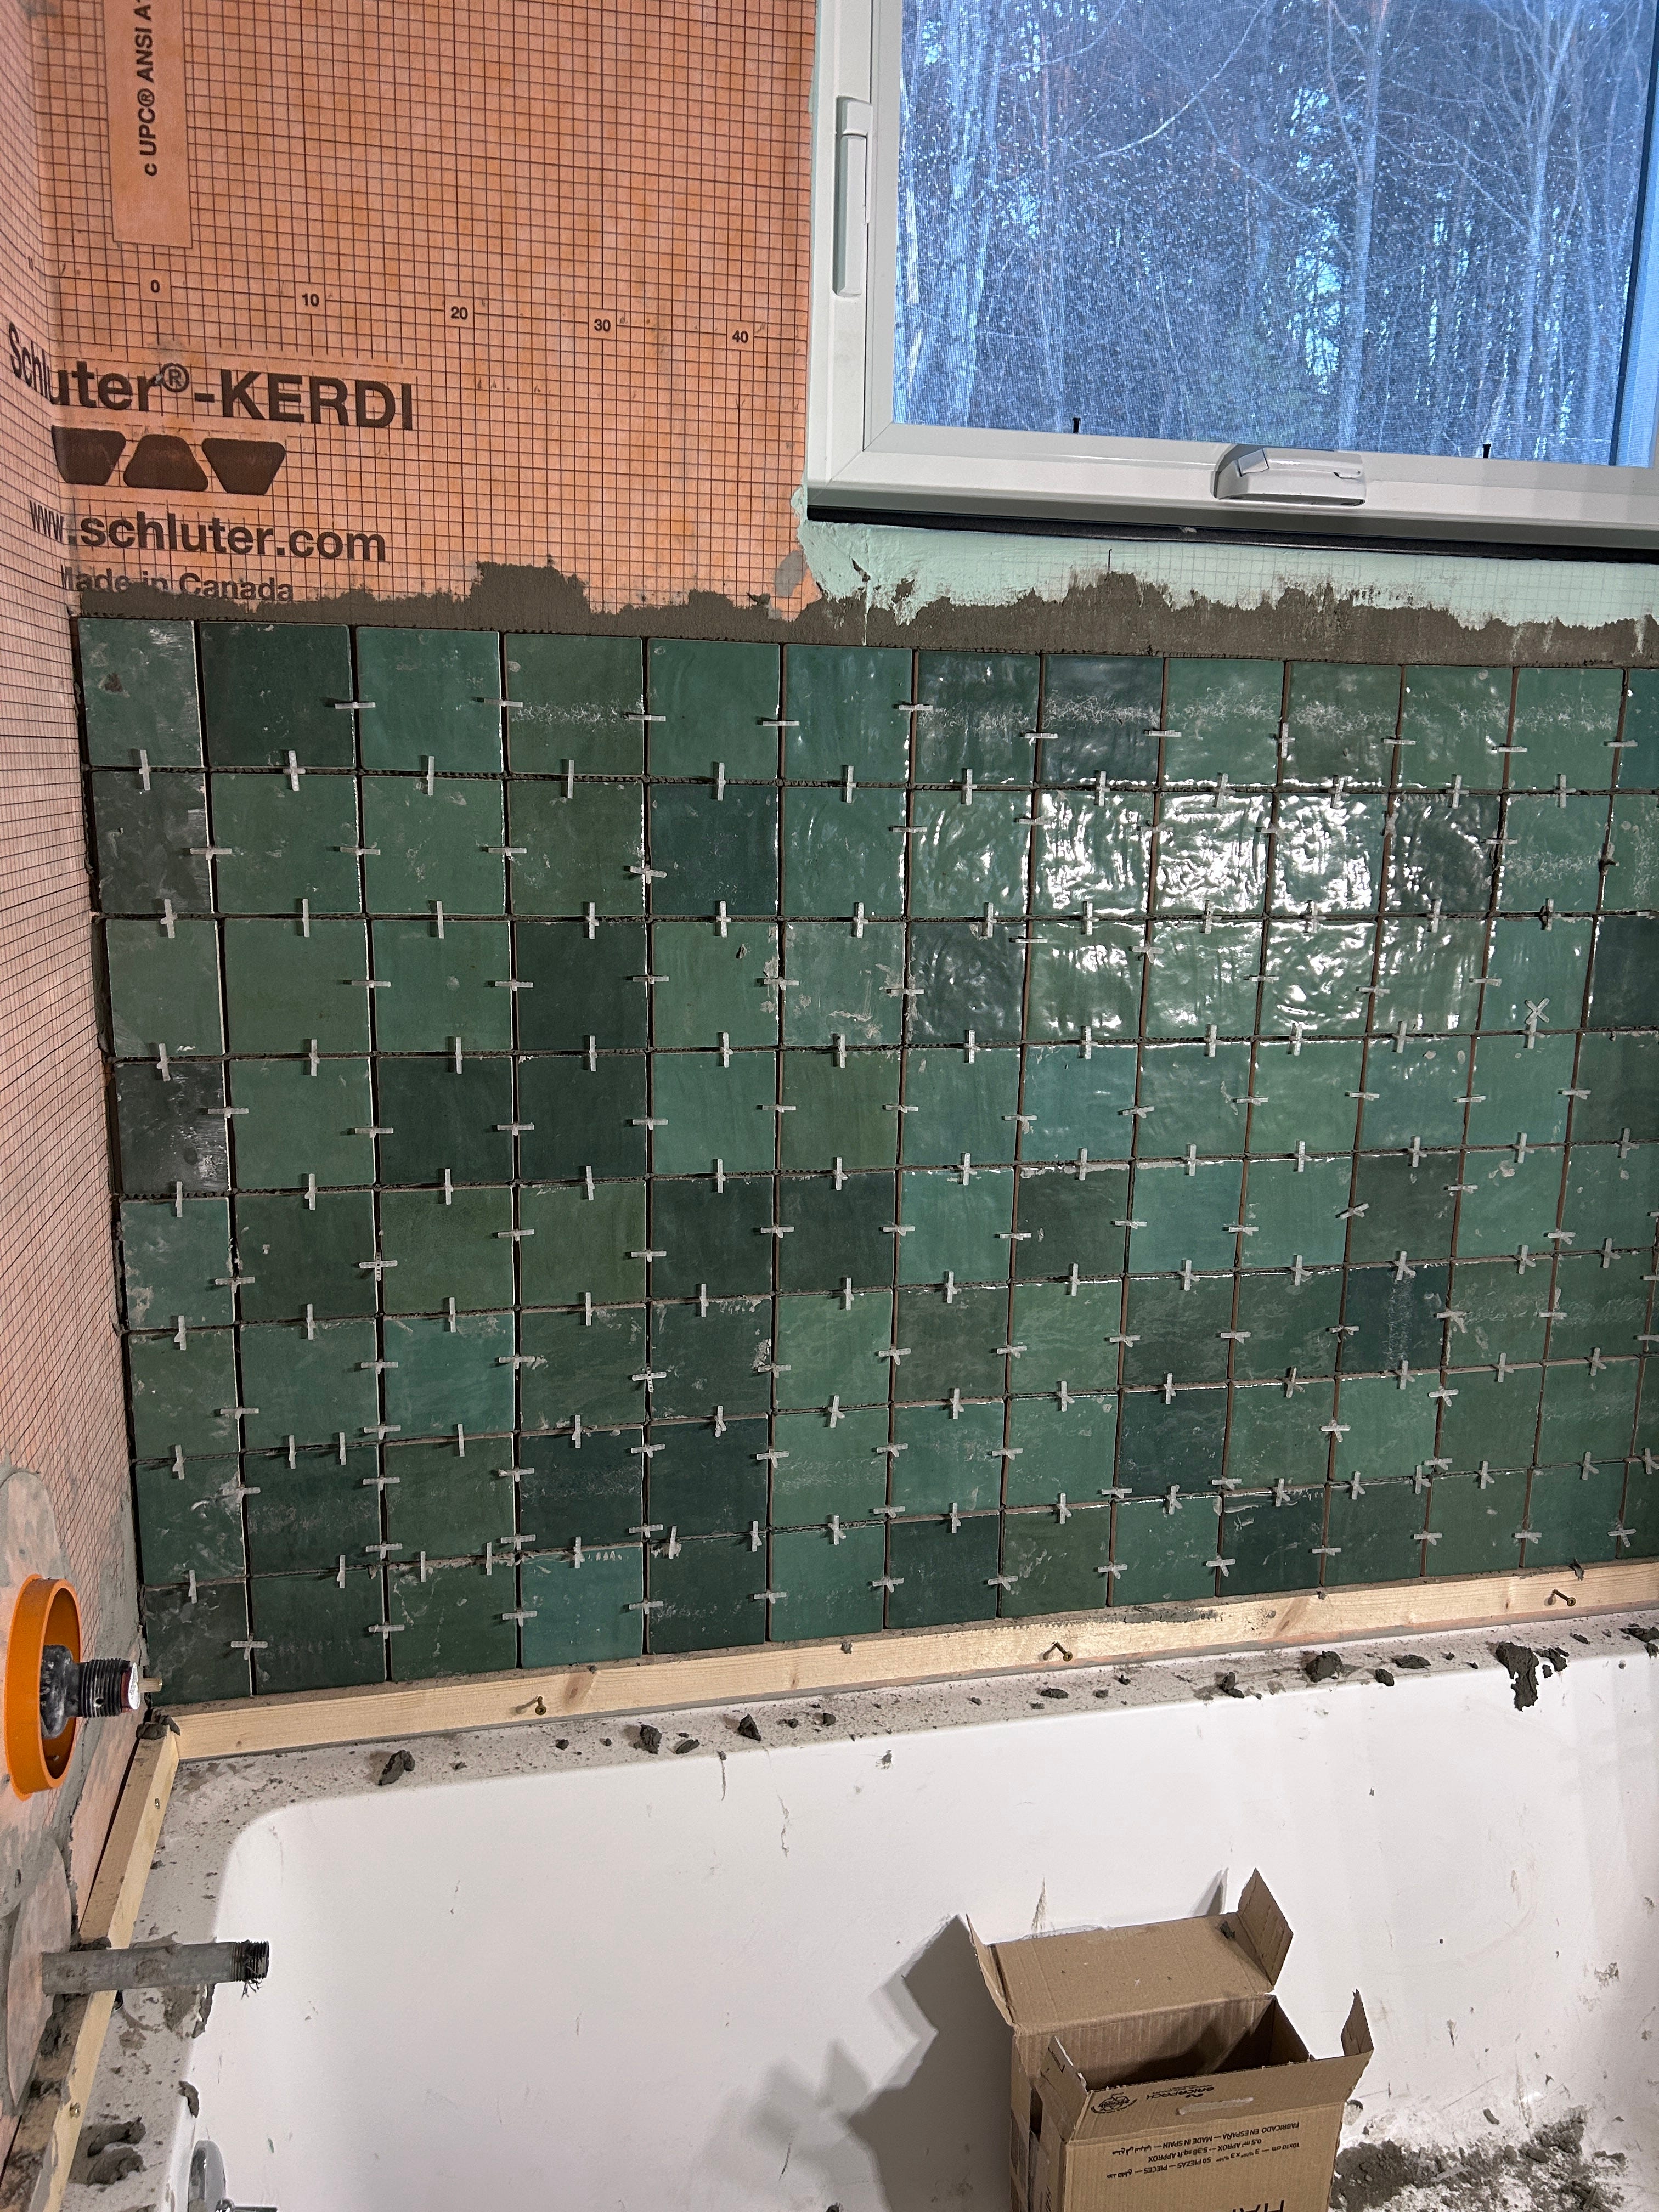
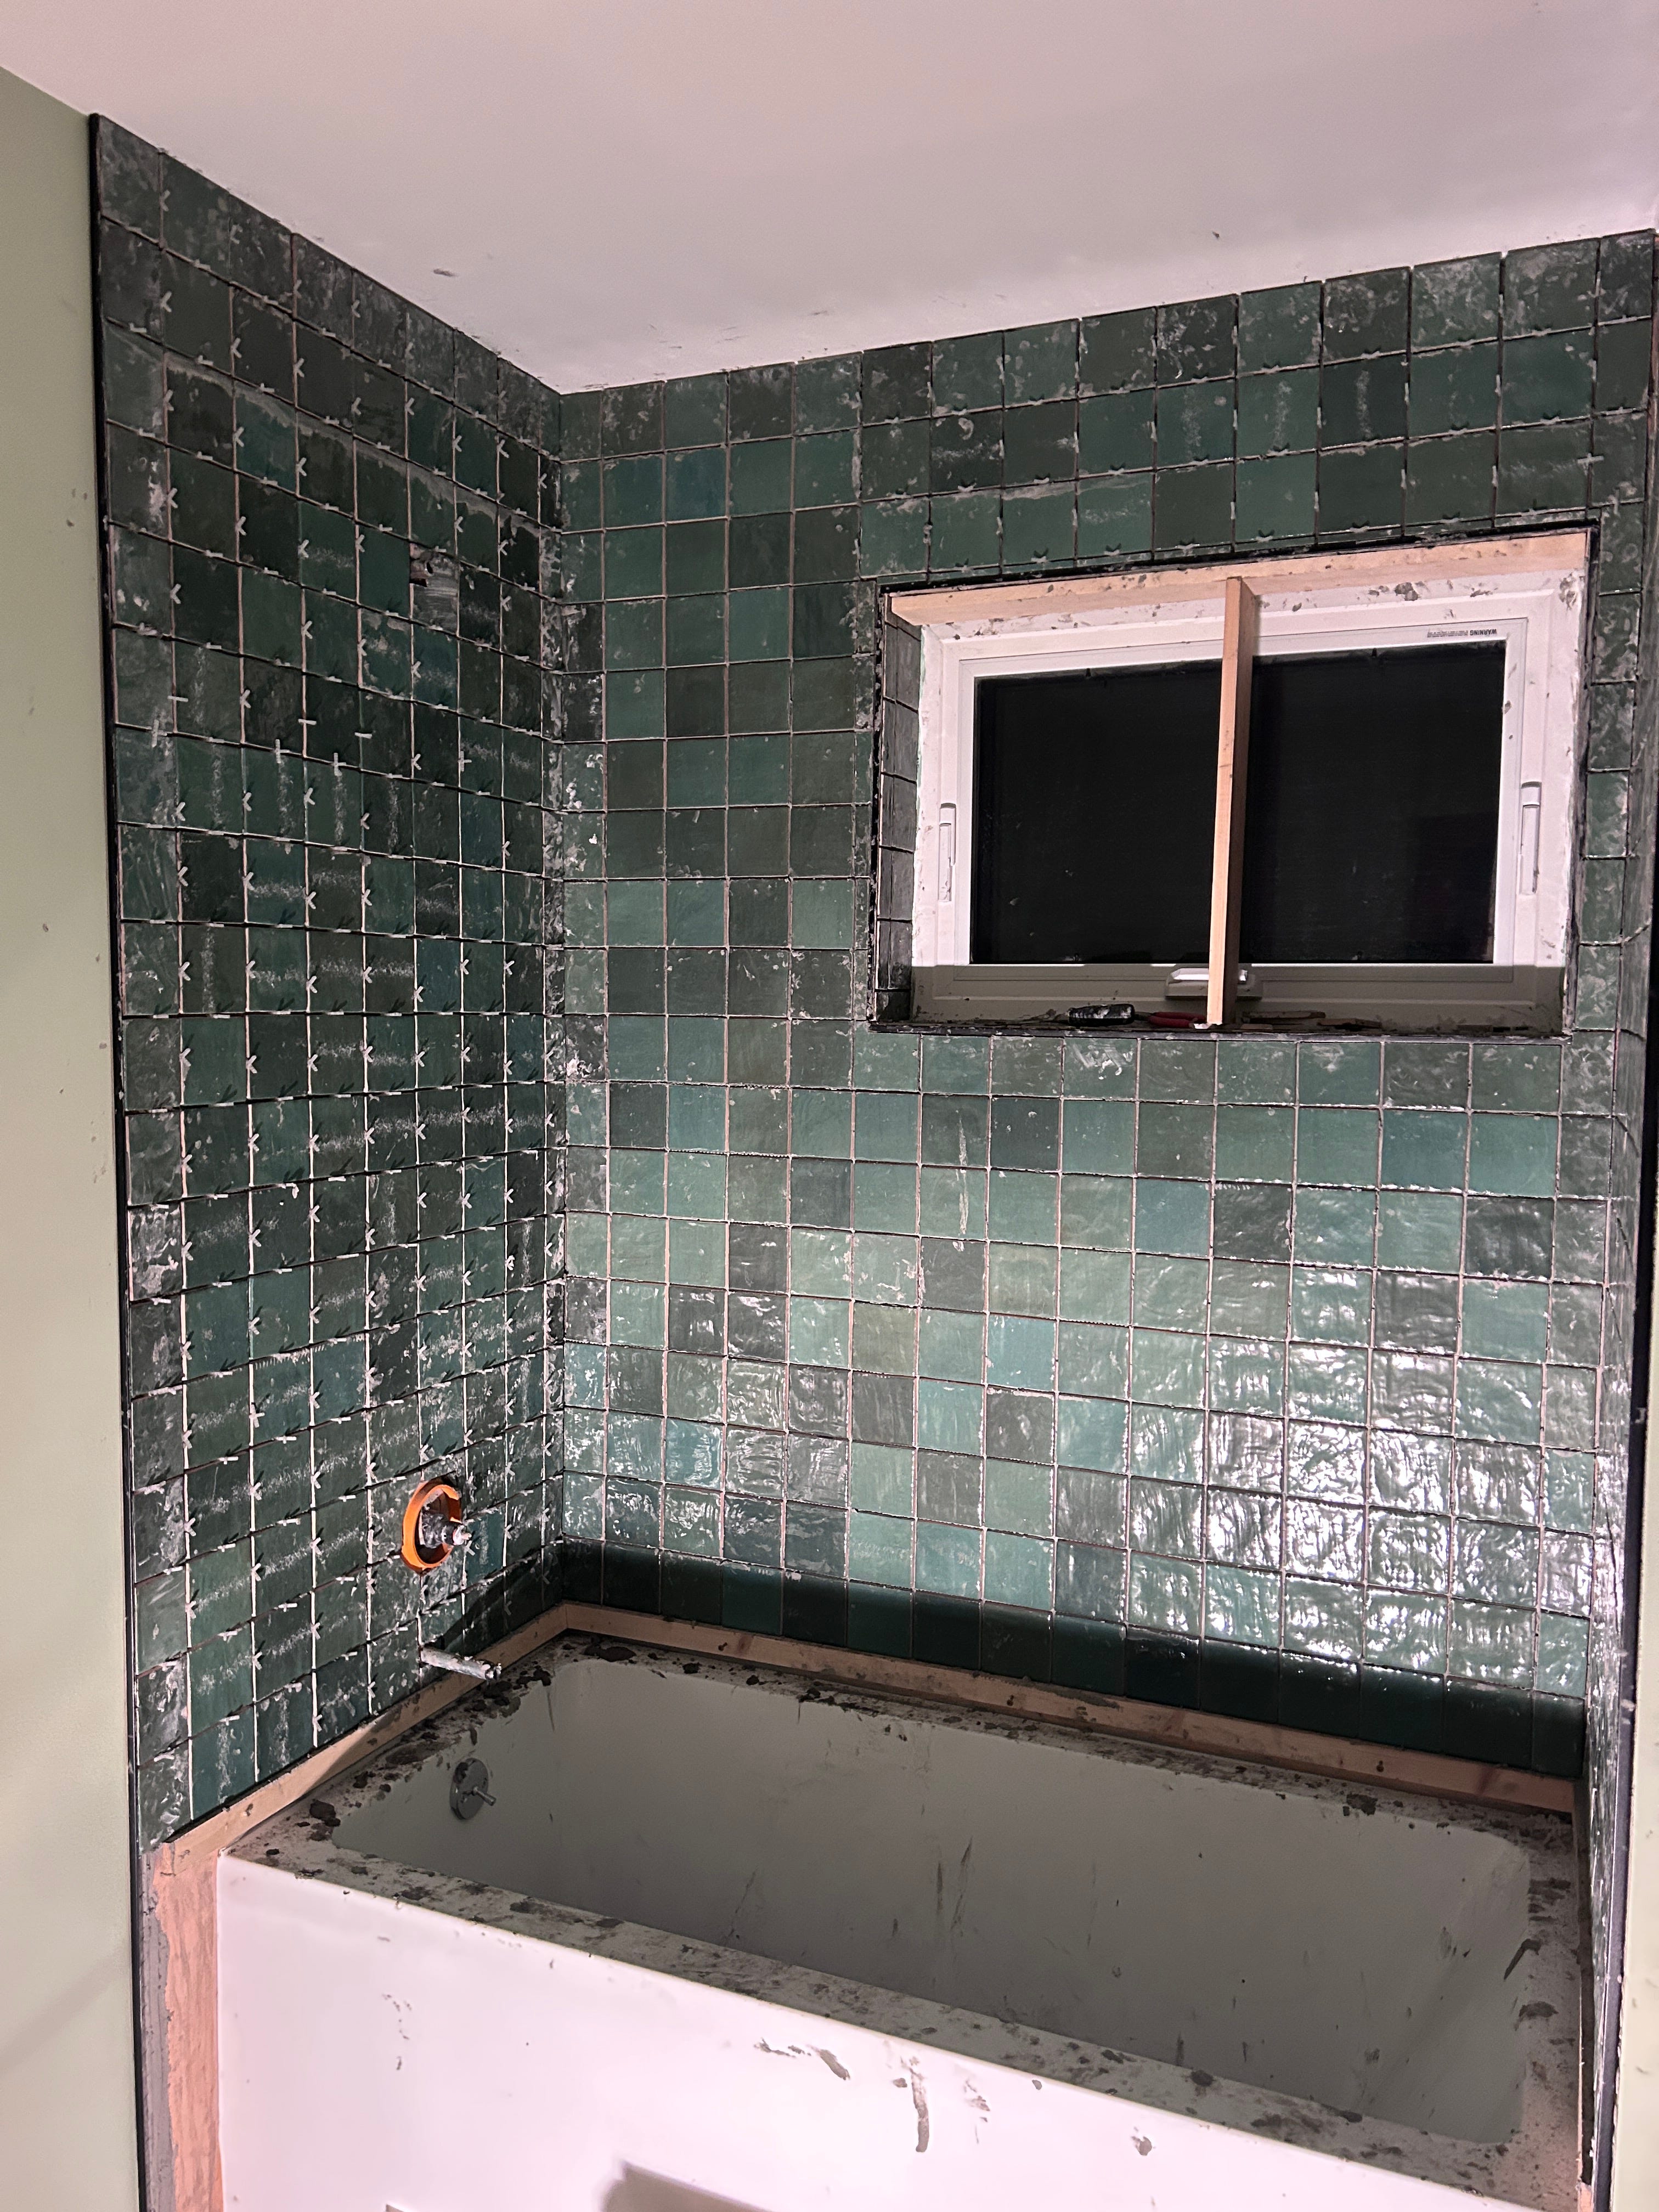
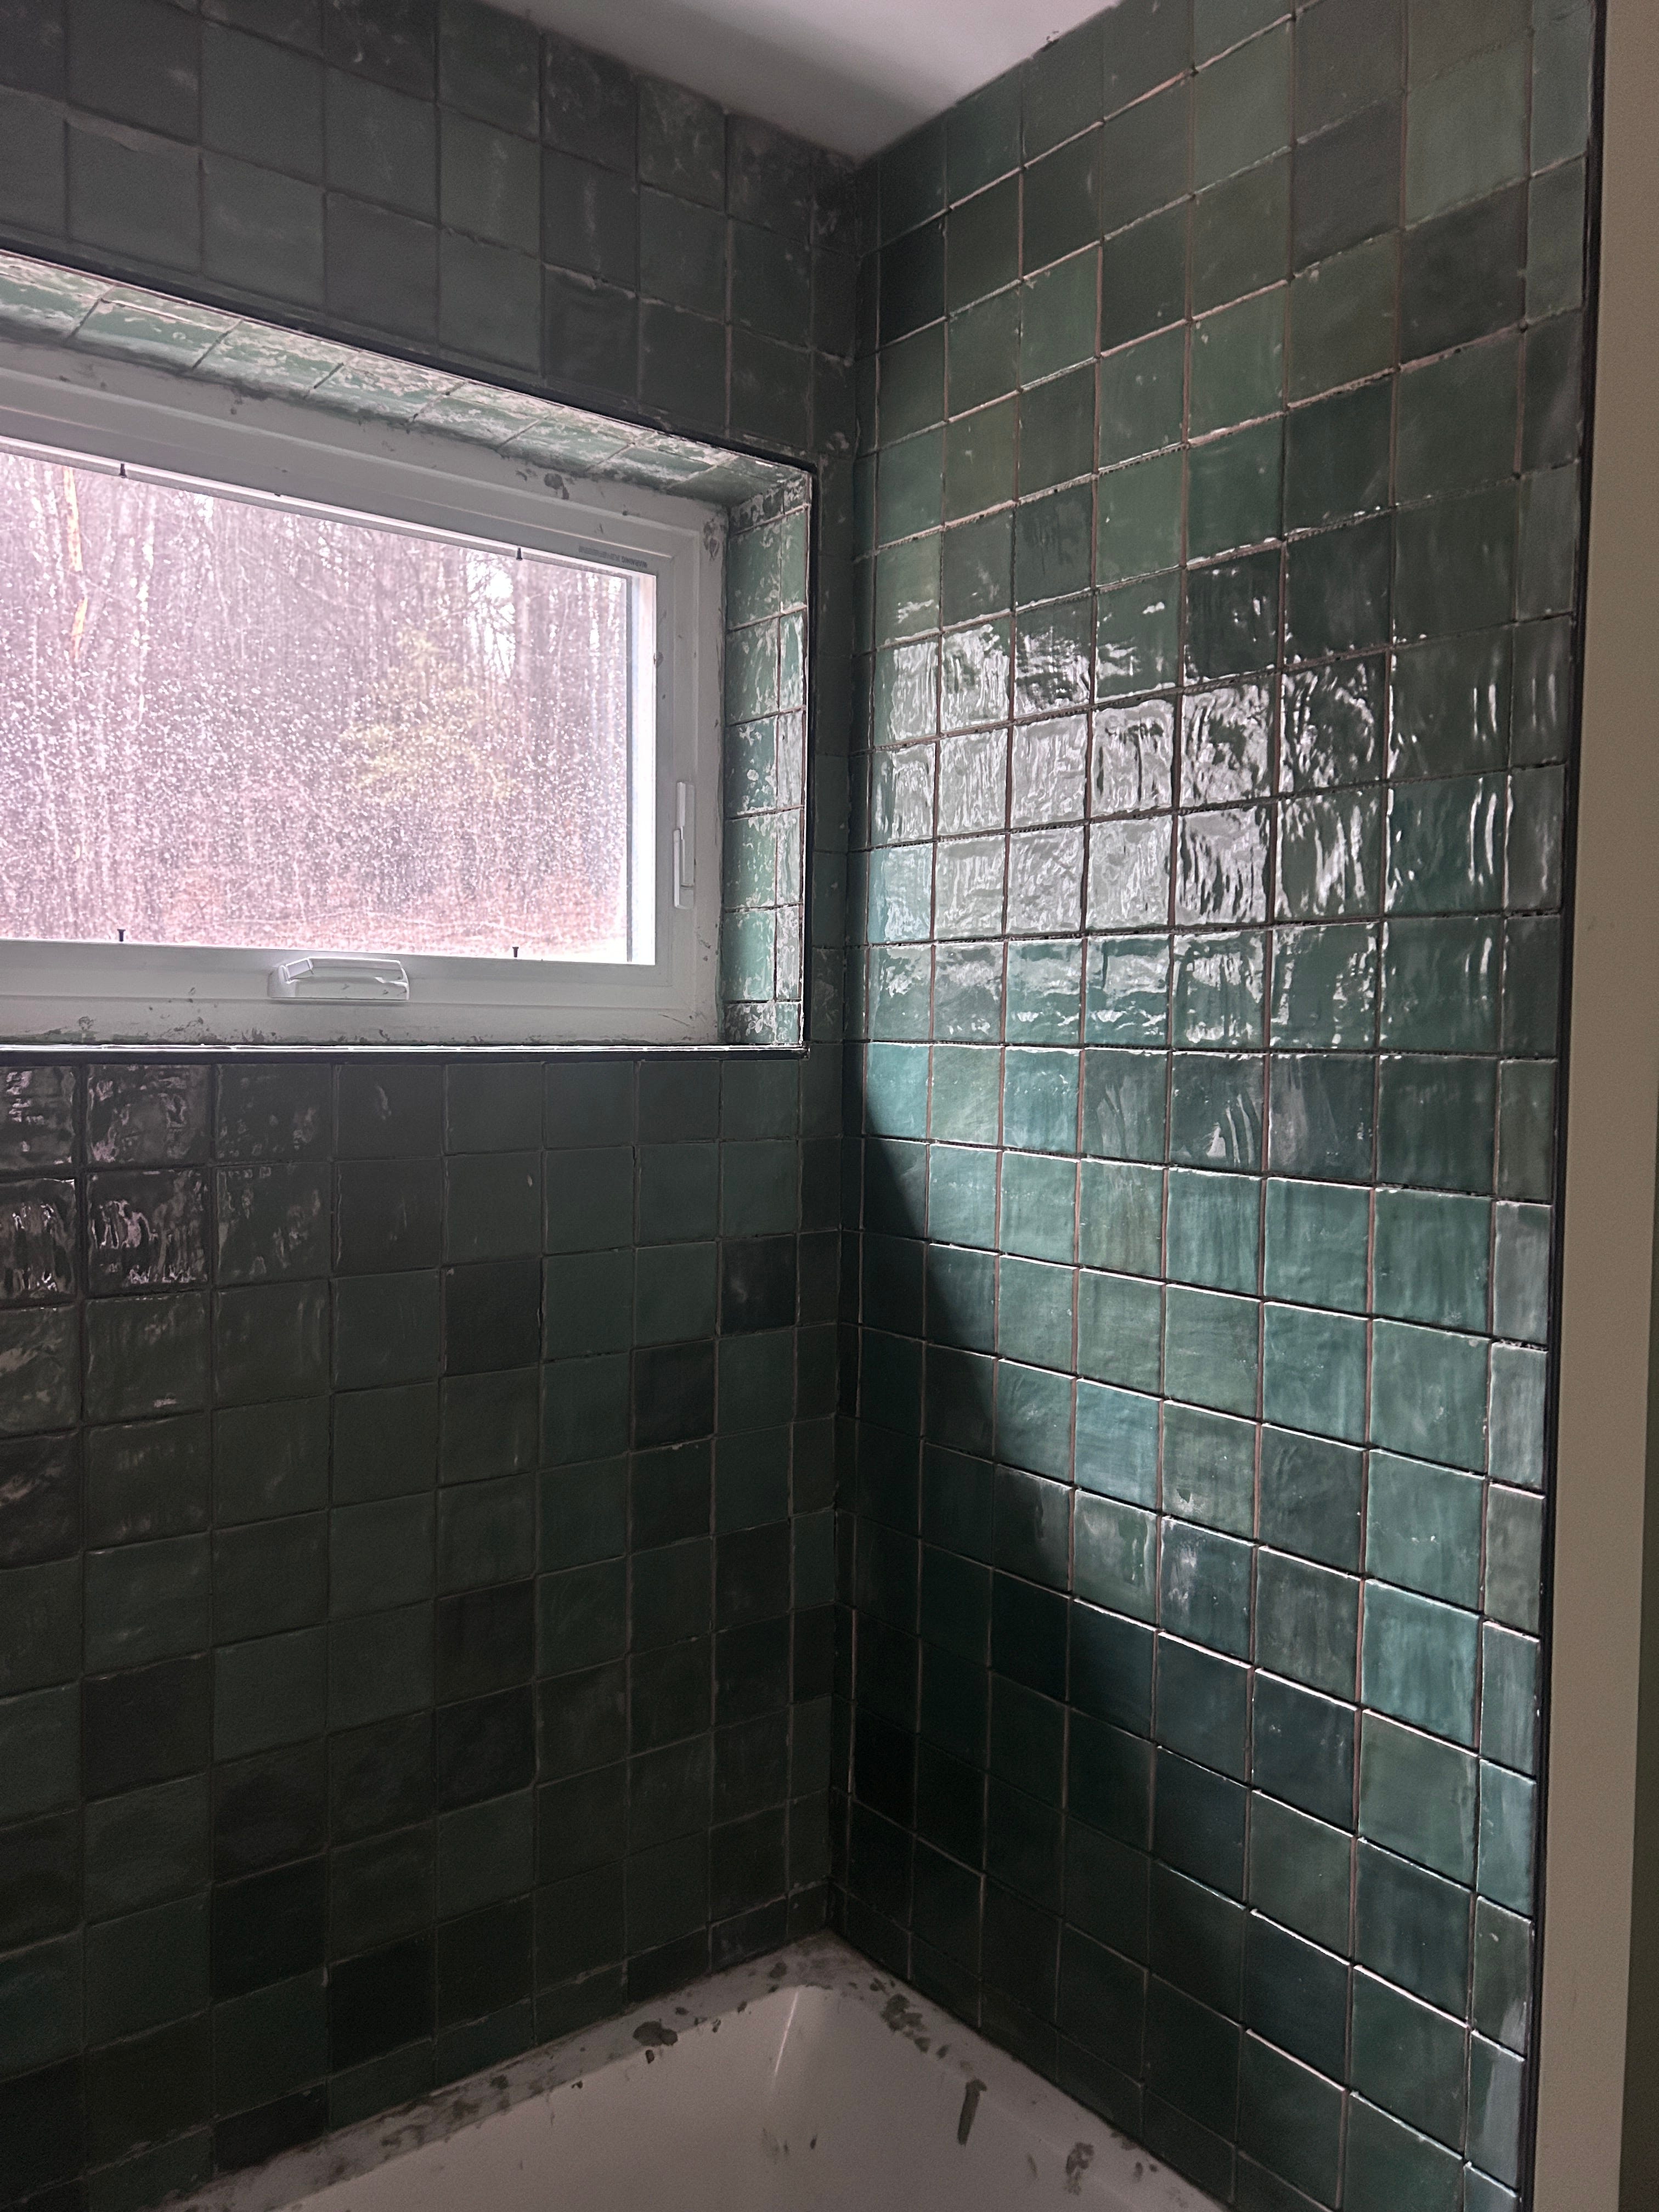
We started in the second bathroom. We expected these tiles to be harder to work with since they weren’t perfectly uniform, but they were actually much easier! Because they have a natural, organic feel, it is much easier to make them look uniform. Imperfections are harder to spot. In this bathroom, we also had to tile around a window.
For the most part, I laid the tiles on the walls, and Emilio cut them. This system worked pretty efficiently, and we got into a rhythm. It took long nights, a massive amount of mess (remember, we had no lights or water!), tired arms, and some exasperation. But, it was also quite simple. Smear mortar on the walls, place a spacer, place a tile, repeat.
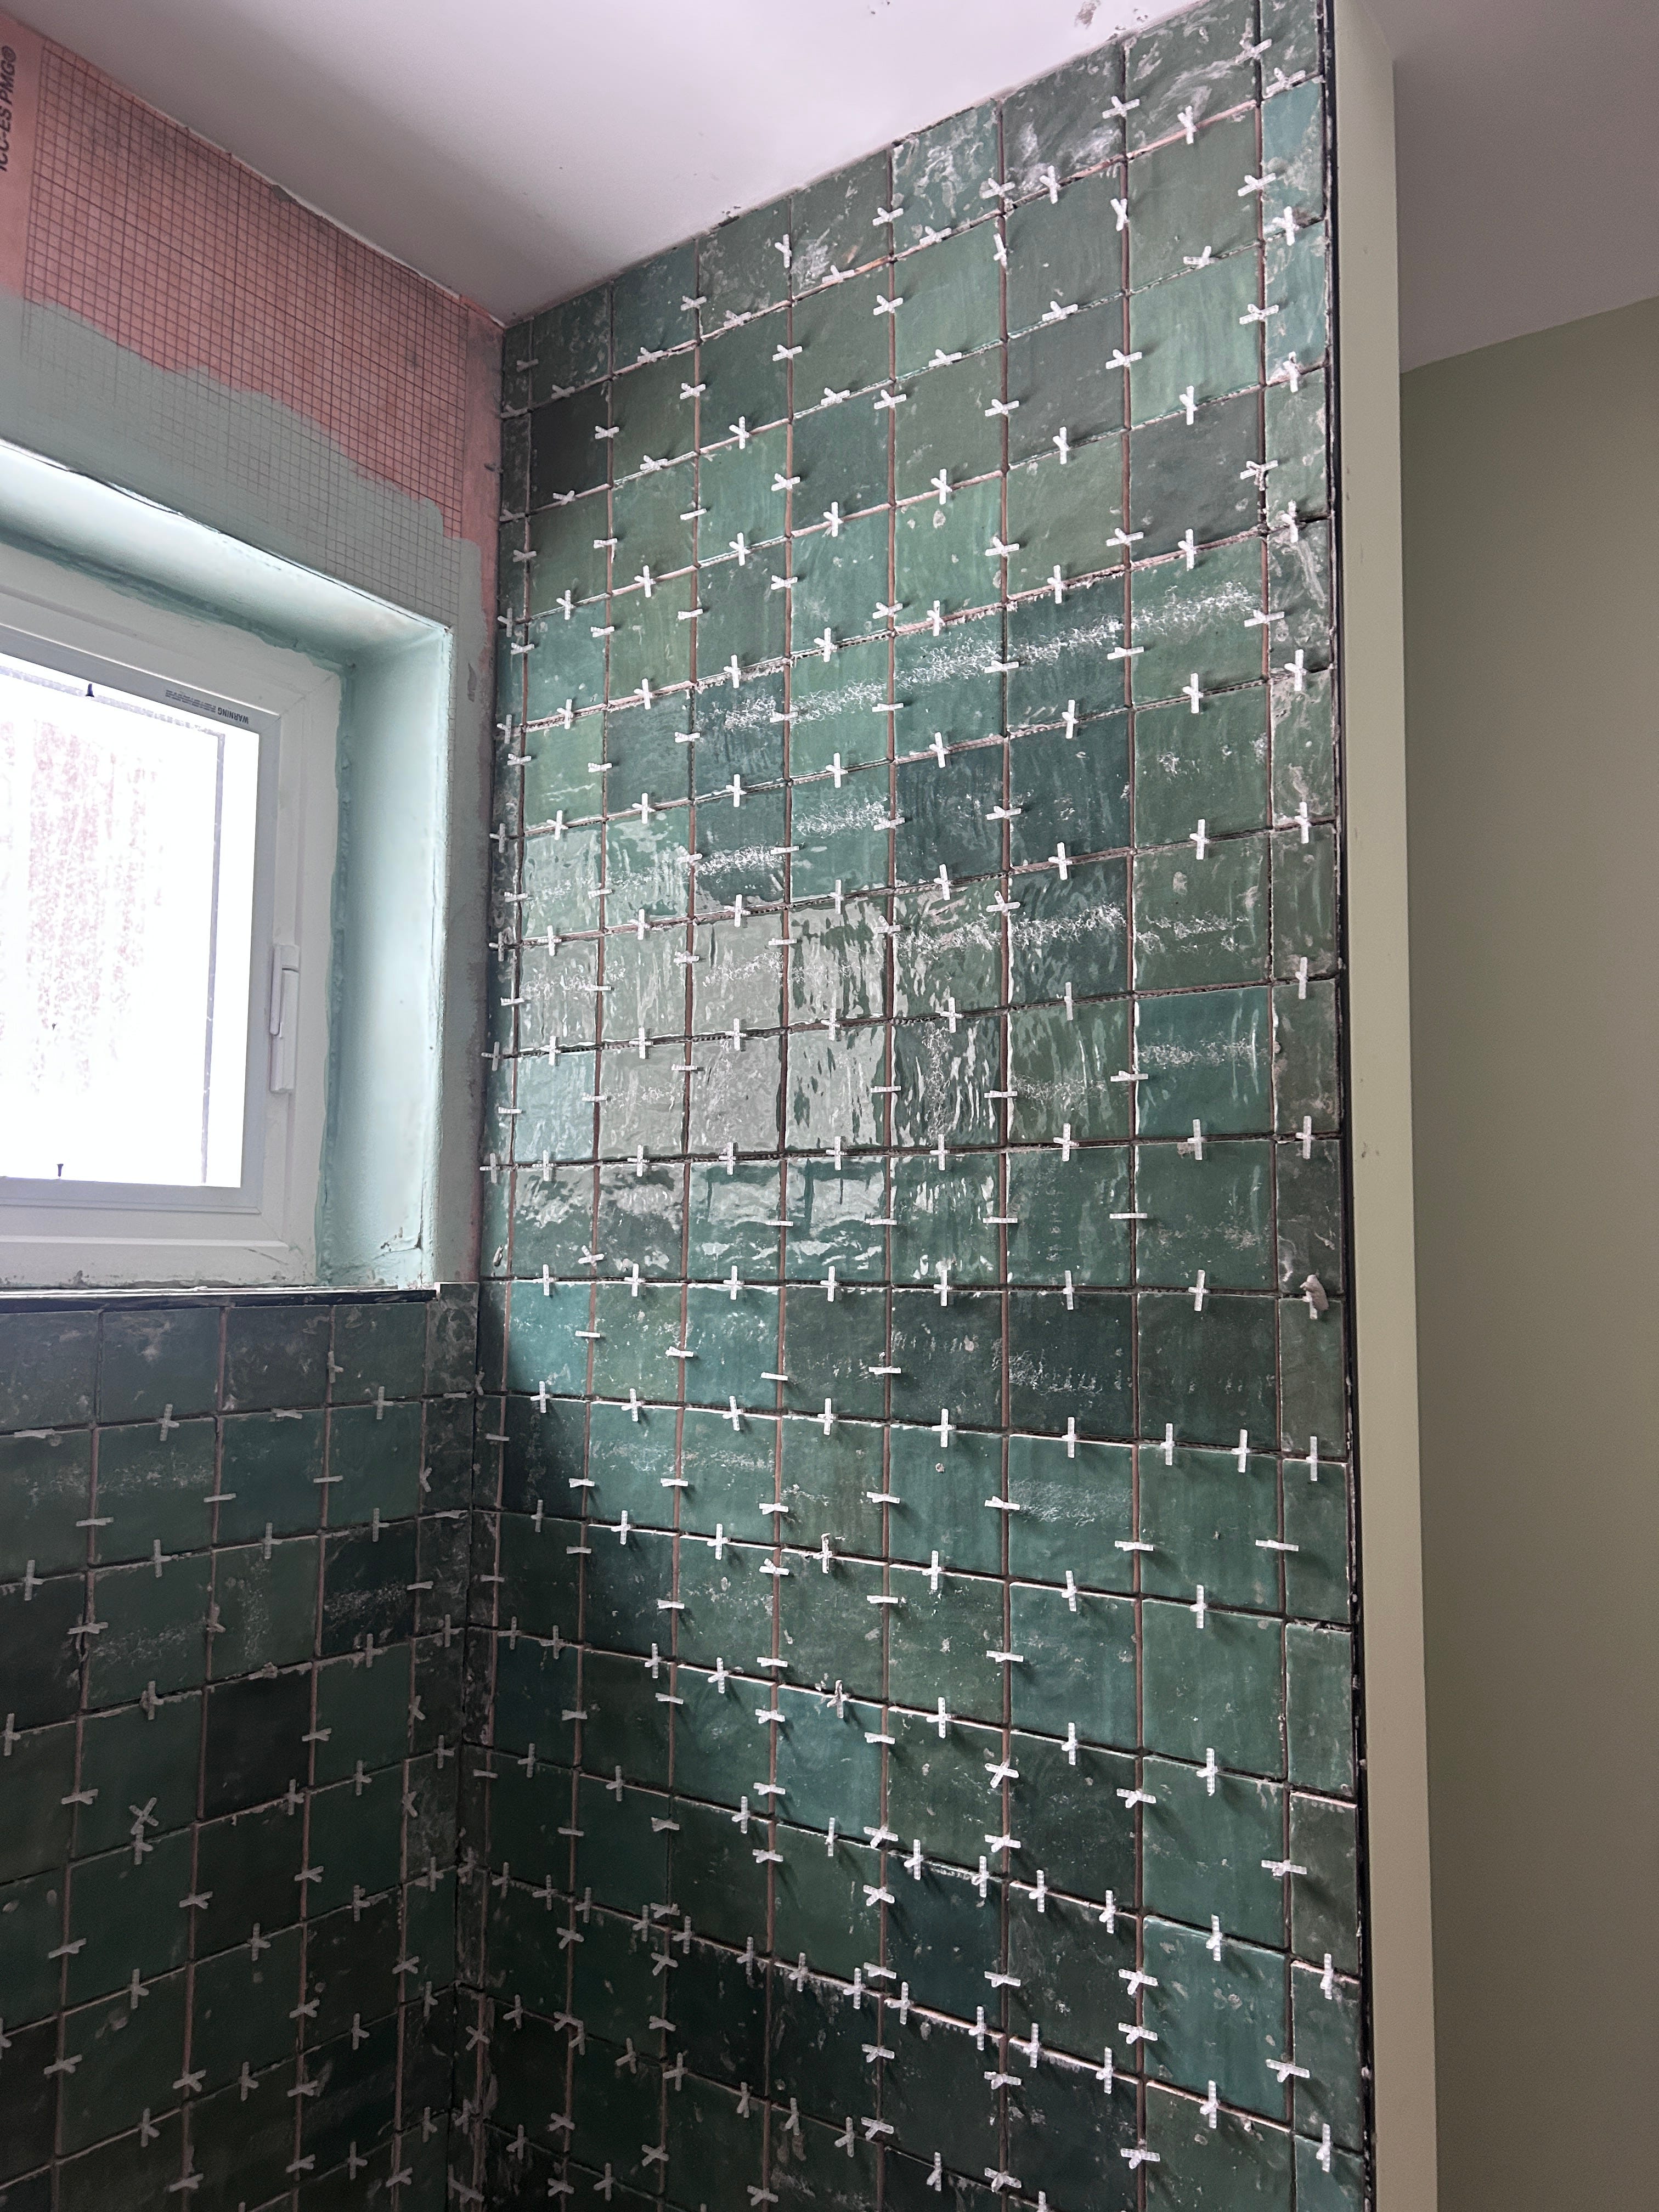
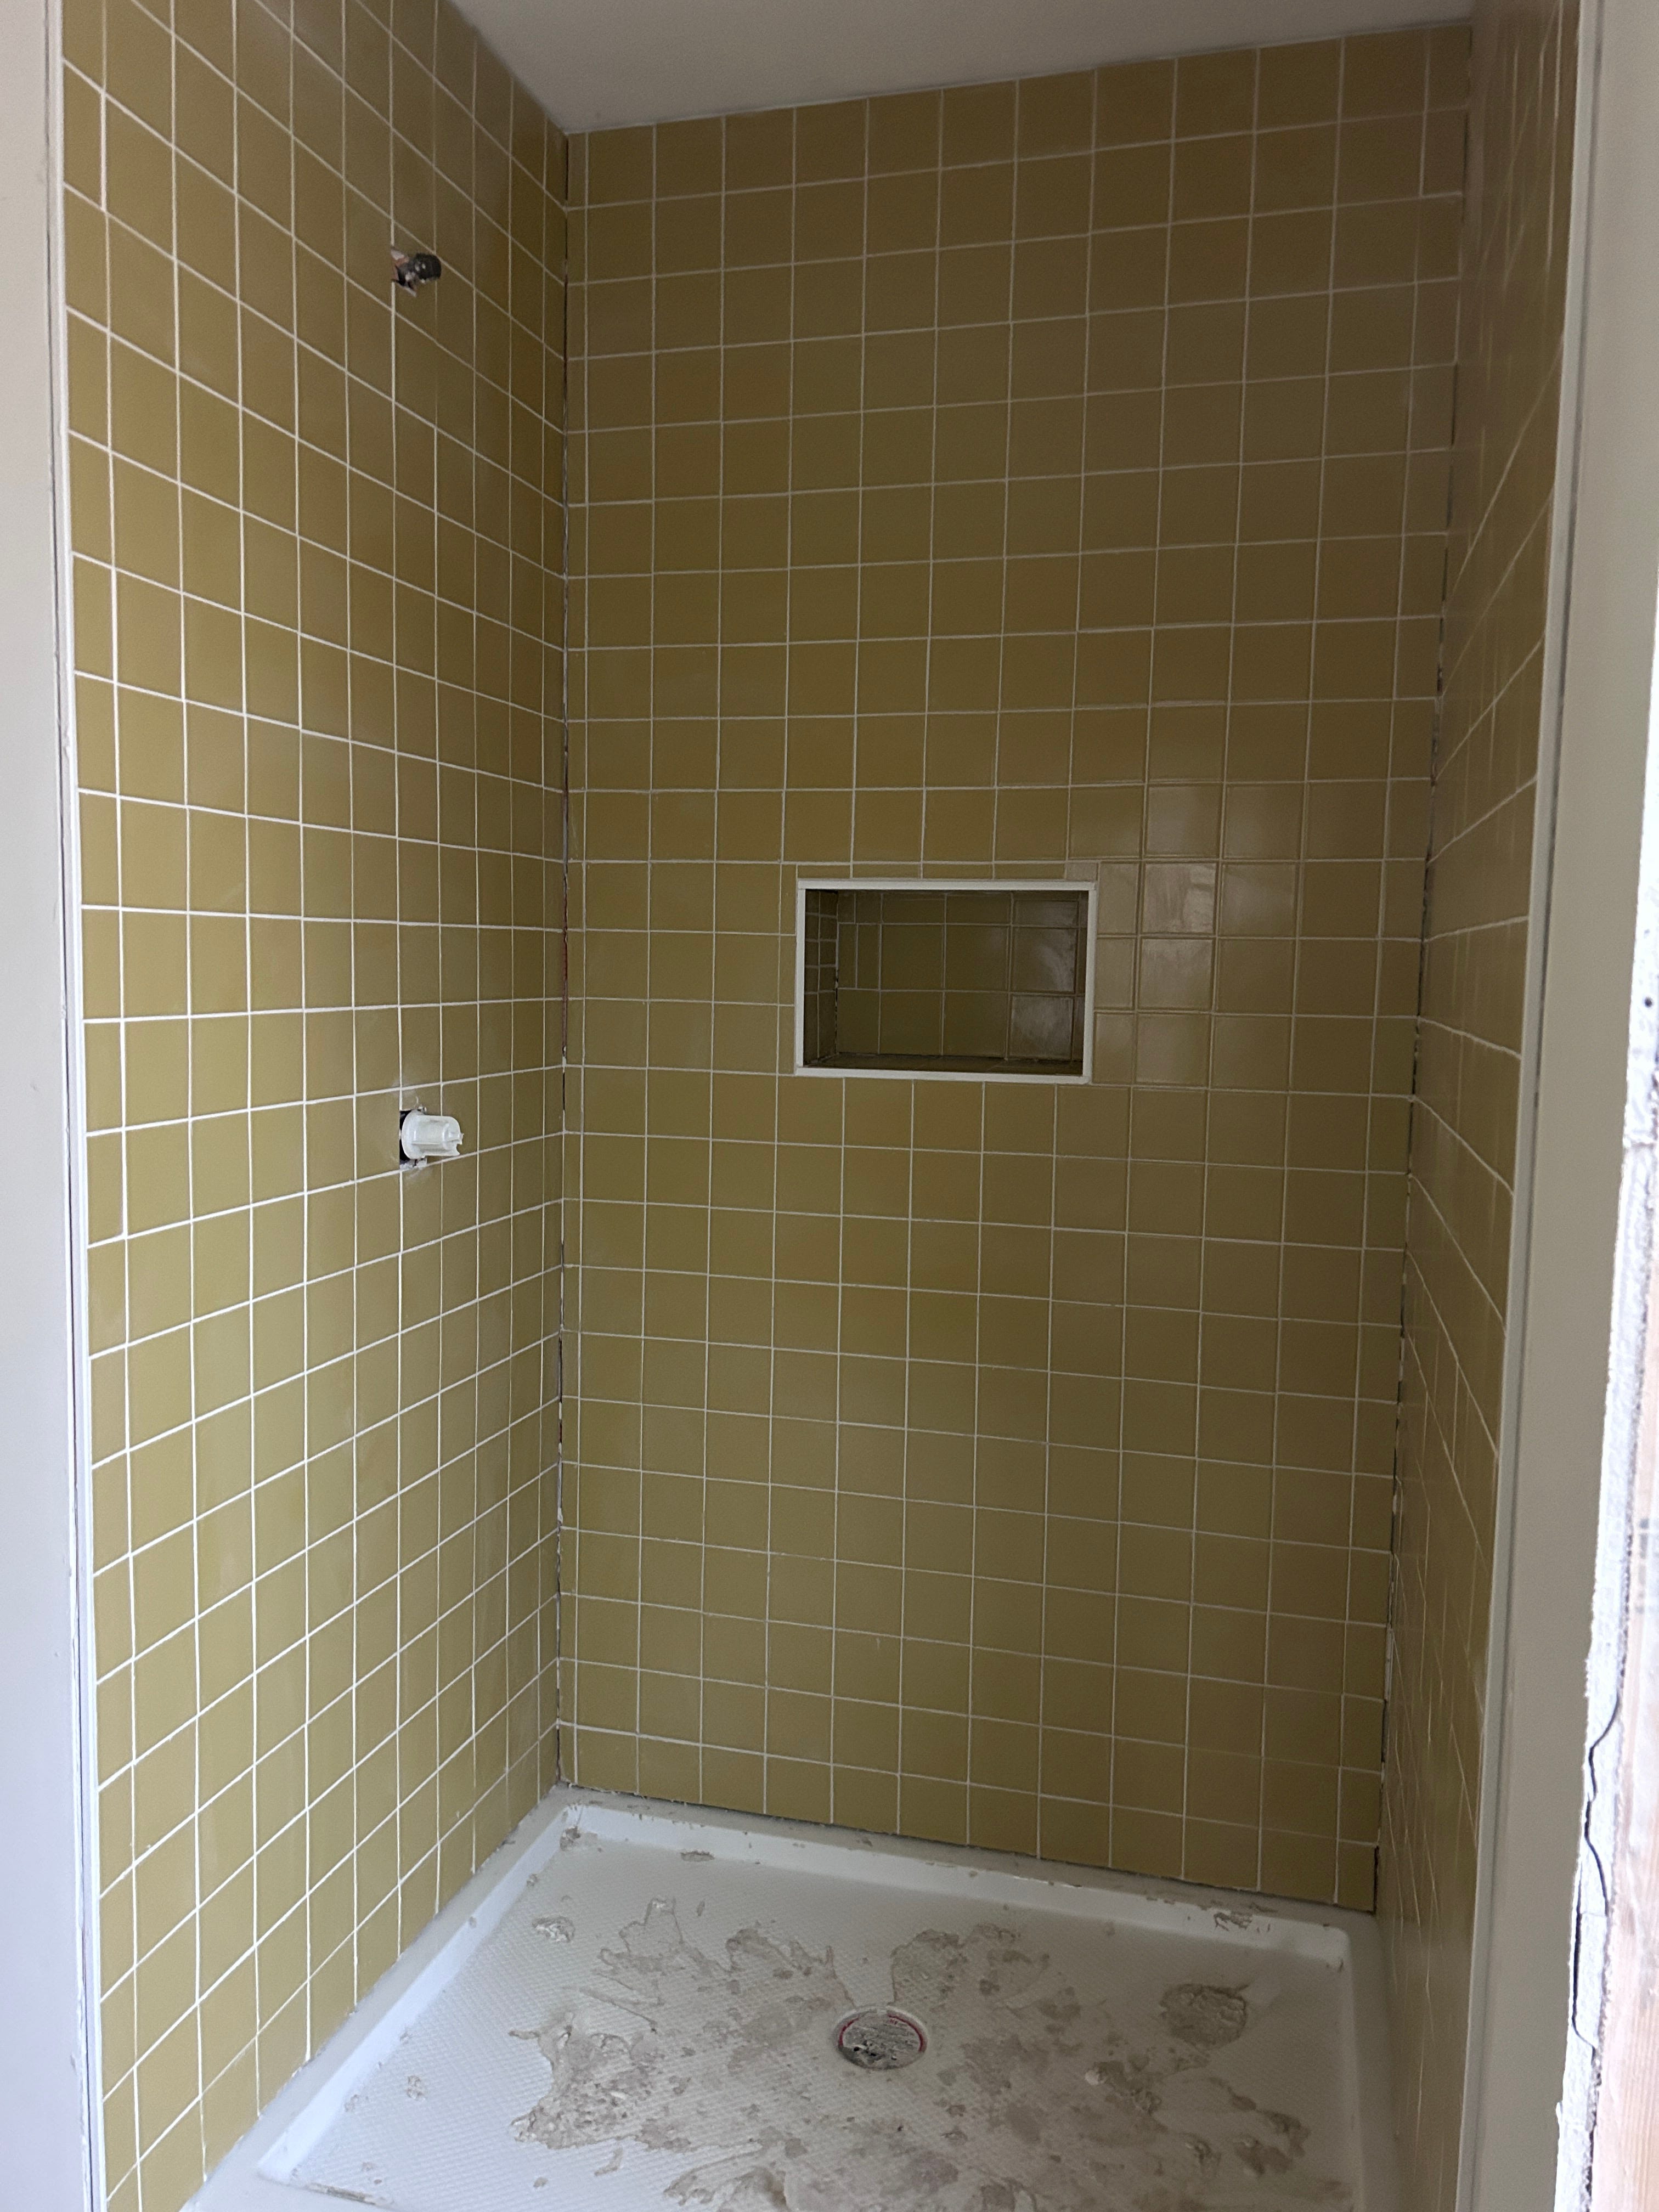
We dove into the second shower with the same workflow. I thought this one would be easier, but it actually was quite a bit more difficult. Since every tile was perfectly uniform, it was much easier to tell if anything was a little bit off.
There are also lots of little tiling details that slowed things down. Each edge needed a border—we chose metal pieces that could be installed under the tile. Every edge needed an even starting point, so we had to measure and install ledgerboards. Anything upside down needed bracing while it dried. Emilio made careful calculations to ensure the tiles would be centered in all directions.
Then, unfortunately, we began to run out of tile.

At about this point, we knew we would not have enough for everything (though, we did have 2 extra boxes of the tile from the other bathroom!). We were able to finish the main walls with what we had, but we had to improvise for the niche in the wall. Instead of ordering more tile (we were over it!), we used offcuts to mosaic the walls and ceiling of the shelf.
This was, to be both dramatic and realistic, hellish! I wouldn’t do that part again. But, finally, it was all tiled! Grouting was laborious, but pretty easy too—the only part of the process that was harder in the green bathroom.
All that was left was to add caulking to all the edges and corners. This is a messy and no-fun endeavor. It’s hard to explain, but caulking sticks to everything, doesn’t like to lay smooth and even, and took us a lot of trial and error. But, eventually we got it done.
And, we let out a deep breath. We had completed our most pressing work (and before the electricity had even come on!). We had hoped to spend the holiday season in our new house, but we at least got to spend it resting. Other people came back around to complete their work.
And, finally, at last, thank goodness, our electricity was turned on!


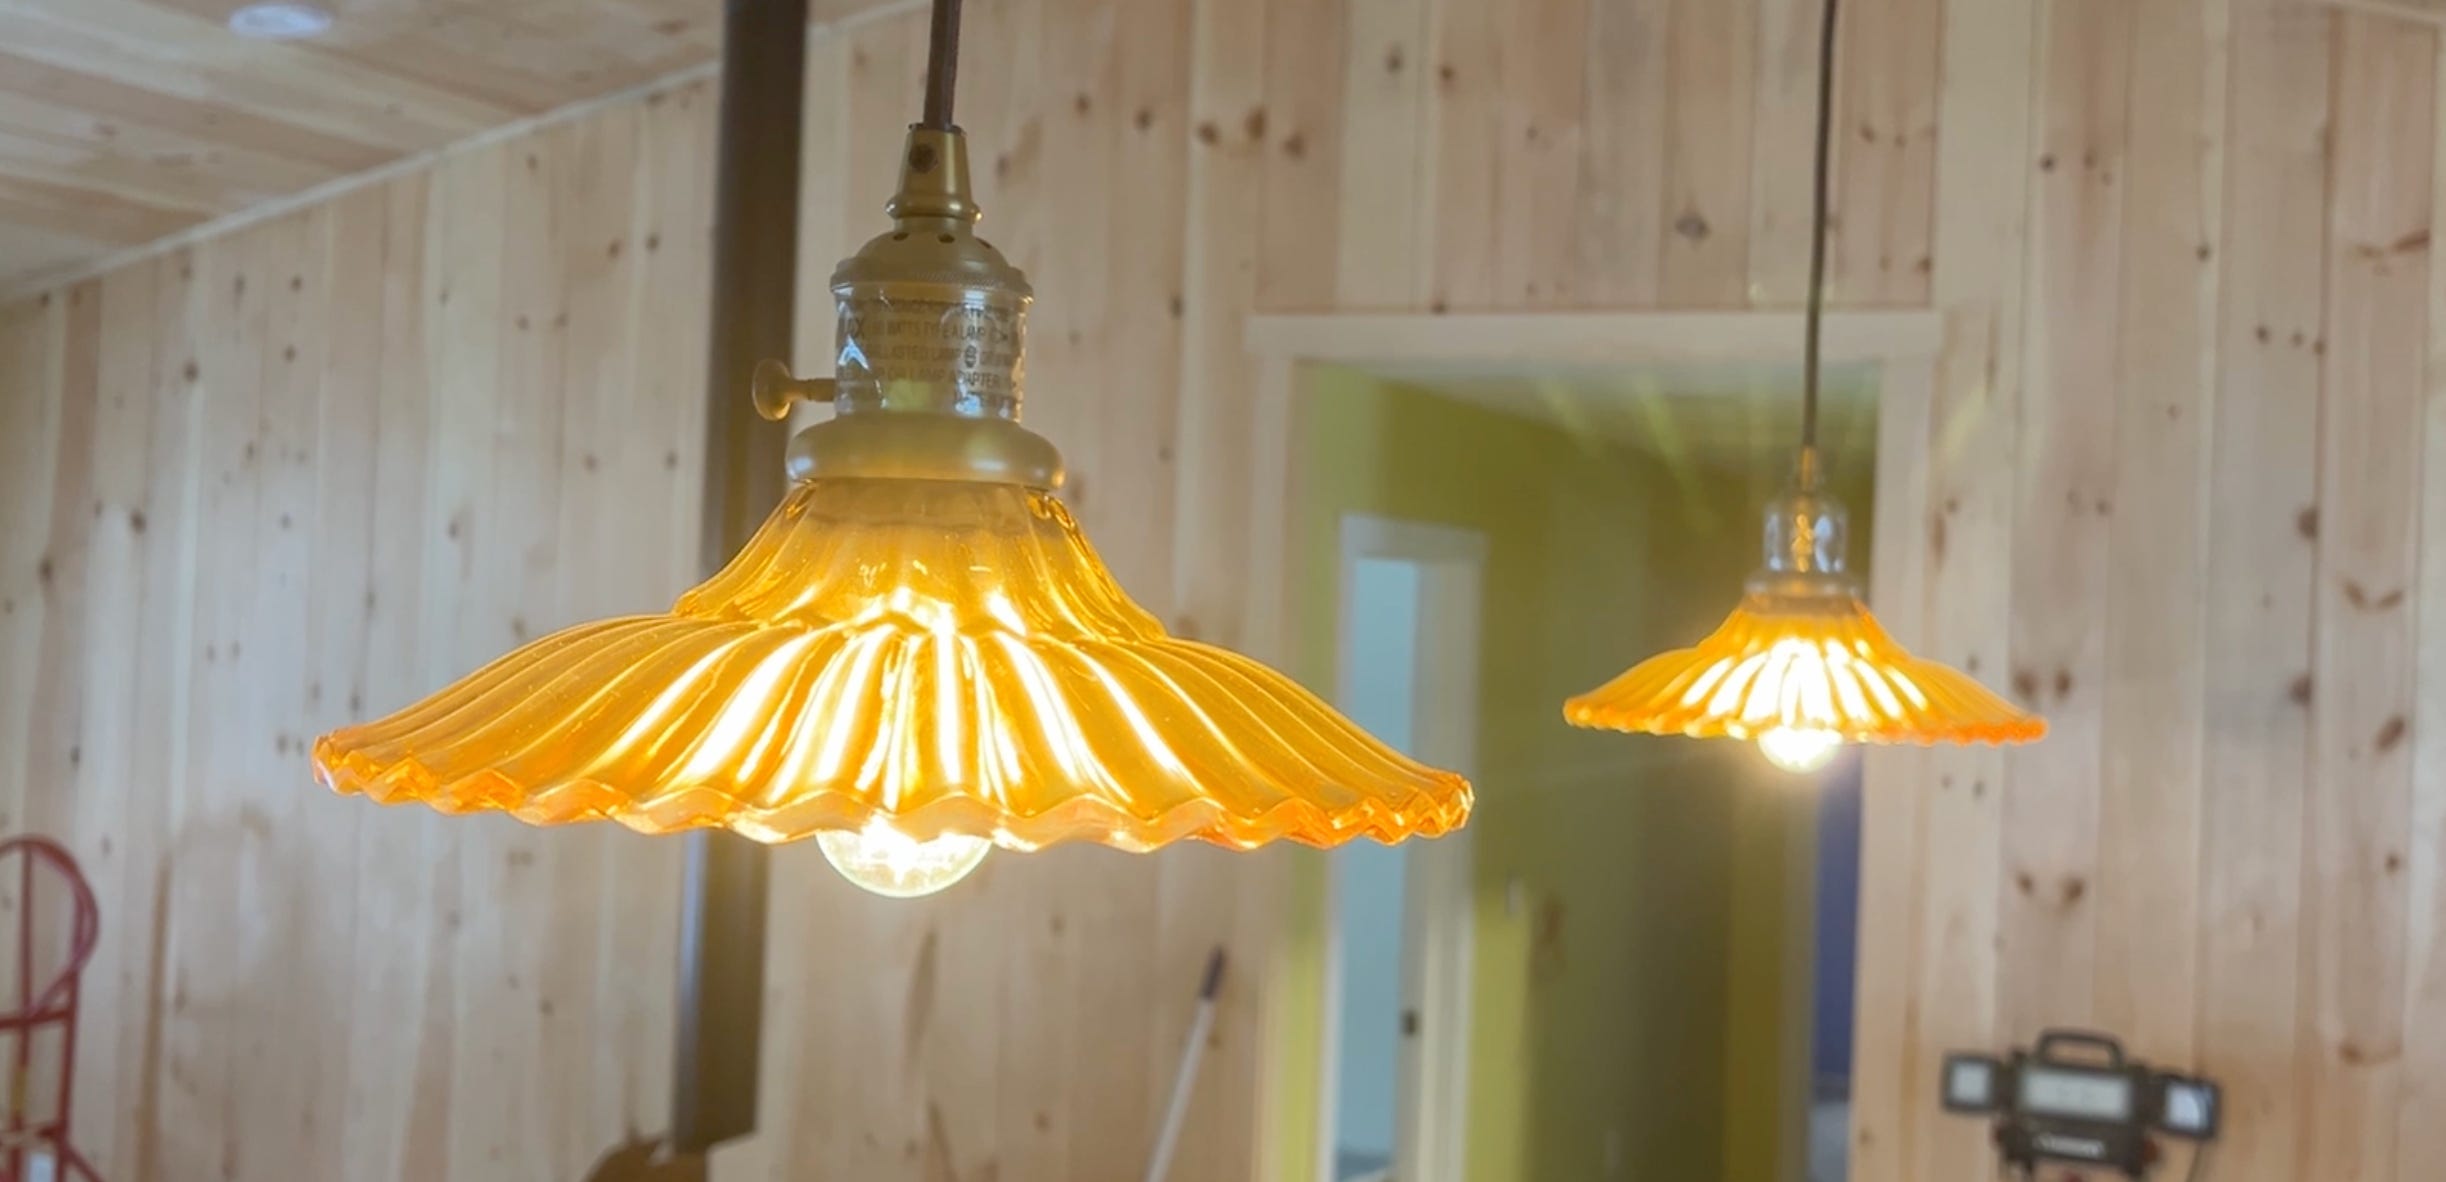
In the following weeks, our wood stove was installed, the cabinets, counters, and shelves came in, the final electric and plumbing hook-ups were installed, and the doors and trim put in. We fought the delivery truck drivers and distributors until they finally brought our appliances. Emilio heroically installed all the baseboards, and we worked on bonus paneling in our bathrooms.
We couldn’t get enough of seeing all the lights on. We tested our well water and found it to be clean and pure (and delicious!).

Soon enough, the only thing left was to clean and seal the floors.
Next Time on We Make a Home…
A final summary & photos of our favorite little details!
Y’all are AMAZING!! It looks beautiful 😍♥️♥️!!
Firstly, I love your tiles! Secondly, I cannot believe you installed them without lights or water! Thirdly, the little niche tiled with left-overs is charming. Hats off to you and Emilio! I can't wait for your next post Madison :)